
The Honda Civic is a popular compact car known for its reliability and performance. However, like any vehicle, it can experience brake system problems that affect its safety and drivability. This article will explore the common symptoms, causes, and fixes for Honda Civic brake system issues, as well as provide guidance on diagnosing and resolving them to ensure optimal braking performance.
Brake system problems can manifest in various ways, such as a spongy brake pedal, grinding noises, or reduced stopping power. These issues can be caused by worn brake components, fluid leaks, or malfunctions in the hydraulic system. Identifying and addressing brake problems promptly is essential for maintaining vehicle safety and preventing further damage to the braking system.
In this article, we will cover the following topics:
Common symptoms of brake issues
Causes of brake system problems
Diagnosing brake system issues
DIY fixes for common brake problems
When to seek professional help
Preventive maintenance for Honda Civic brakes
Honda Civic brake system problem causing no-start condition
By understanding these aspects of Honda Civic brake system problems, you can take appropriate action to keep your vehicle's brakes functioning optimally and ensure a safe driving experience.
A spongy or soft brake pedal is a common symptom of brake system problems in Honda Civics. This condition occurs when the brake pedal feels soft or sinks to the floor when pressed, requiring more effort to stop the vehicle. A spongy pedal can be caused by air in the brake lines, a leak in the hydraulic system, or a failing master cylinder.
If you experience a spongy brake pedal, it is crucial to have the brake system inspected and repaired promptly. Continuing to drive with this issue can lead to increased stopping distances and reduced braking performance, compromising vehicle safety.
Grinding or squealing noises when braking are another common symptom of brake system problems in Honda Civics. These noises can indicate that the brake pads have worn down to the metal backing plate, causing them to grind against the rotors. Squealing noises may also be caused by worn brake pad wear indicators, which are designed to alert the driver when the pads need replacement.
If you hear grinding or squealing noises when braking, it is essential to have the brake pads and rotors inspected and replaced as necessary. Continuing to drive with worn brake components can cause damage to the rotors, increasing repair costs and compromising braking performance.
Vibrations felt through the brake pedal or steering wheel during braking can indicate warped or unevenly worn rotors in Honda Civics. Rotors can become warped due to excessive heat, improper installation, or prolonged exposure to moisture and corrosion. Unevenly worn rotors can cause the brake pads to contact the rotor surface inconsistently, leading to vibrations and pulsations during braking.
If you experience vibrations during braking, it is crucial to have the rotors inspected and either resurfaced or replaced, depending on their condition. Driving with warped or unevenly worn rotors can lead to reduced braking performance, increased stopping distances, and accelerated wear on brake pads.
Reduced stopping power is a serious symptom of brake system problems in Honda Civics. This condition occurs when the vehicle requires a longer distance to come to a stop, even when applying firm pressure to the brake pedal. Reduced stopping power can be caused by worn brake pads, contaminated brake fluid, or a malfunctioning master cylinder.
If you notice reduced stopping power, it is essential to have the brake system inspected and repaired immediately. Continuing to drive with this issue can significantly increase the risk of accidents, as the vehicle may not be able to stop in time to avoid collisions.
The brake warning light on the Honda Civic's dashboard is designed to alert the driver of potential brake system problems. This light can illuminate for various reasons, such as low brake fluid levels, worn brake pads, or a malfunctioning parking brake switch. In some cases, the brake warning light may accompany other symptoms, such as a spongy brake pedal or reduced stopping power.
If the brake warning light illuminates, it is crucial to have the brake system inspected by a qualified mechanic as soon as possible. Ignoring this warning can lead to further damage to the brake components and compromise vehicle safety.
Worn brake pads are a common cause of brake system problems in Honda Civics. Brake pads are designed to wear down over time as they contact the rotors to slow the vehicle. As the pads wear, they become thinner and less effective at generating friction, leading to reduced stopping power and increased stopping distances.
| Brake Pad Wear | Symptoms | Recommended Action |
|---|---|---|
| Minor wear | Slight reduction in braking performance | Monitor pad thickness and replace when necessary |
| Moderate wear | Noticeable reduction in braking performance, squealing noises | Replace brake pads as soon as possible |
| Severe wear | Significantly reduced braking performance, grinding noises, damage to rotors | Replace brake pads and inspect rotors for damage |
To prevent brake pad wear from causing more severe problems, it is essential to have the pads inspected regularly and replaced when they reach the manufacturer's recommended minimum thickness.
Warped or damaged rotors can cause vibrations, pulsations, and reduced braking performance in Honda Civics. Rotors can become warped due to excessive heat generated during heavy braking, improper installation, or exposure to moisture and corrosion. Damaged rotors may have deep grooves, cracks, or other surface imperfections that affect their ability to provide a smooth, consistent braking surface.
If warped or damaged rotors are suspected, it is crucial to have them inspected by a qualified mechanic. In some cases, the rotors can be resurfaced to restore a smooth braking surface. However, if the damage is severe or the rotors are below the minimum thickness specification, they must be replaced to ensure proper braking performance and vehicle safety.
Brake fluid leaks can cause a spongy brake pedal, reduced stopping power, and potential brake failure in Honda Civics. Brake fluid is a hydraulic fluid that transmits the force applied to the brake pedal to the brake calipers and pads, allowing the vehicle to slow down or stop. Leaks can occur in various parts of the brake system, such as the brake lines, calipers, or master cylinder.
Common causes of brake fluid leaks include:
Damaged or corroded brake lines
Worn or damaged caliper seals
Cracked or faulty master cylinder
Loose or damaged brake fittings
If a brake fluid leak is suspected, it is essential to have the brake system inspected and repaired promptly. Continuing to drive with a brake fluid leak can lead to a complete loss of braking ability, increasing the risk of accidents.
Malfunctioning calipers can cause uneven brake pad wear, reduced braking performance, and potential brake drag in Honda Civics. Brake calipers house the brake pads and use hydraulic pressure to press the pads against the rotors, slowing the vehicle. Calipers can malfunction due to various issues, such as seized caliper pistons, damaged caliper seals, or corrosion.
Symptoms of malfunctioning calipers include:
Uneven brake pad wear
Vehicle pulling to one side during braking
Brake drag or overheating
Reduced braking performance
If malfunctioning calipers are suspected, it is crucial to have them inspected and repaired or replaced as necessary. Driving with malfunctioning calipers can lead to premature brake pad and rotor wear, as well as compromised braking performance and vehicle safety.
A faulty master cylinder can cause a spongy brake pedal, reduced stopping power, and potential brake failure in Honda Civics. The master cylinder is responsible for converting the force applied to the brake pedal into hydraulic pressure, which is then transmitted to the brake calipers and pads. A faulty master cylinder may have worn or damaged internal seals, leading to a loss of hydraulic pressure and reduced braking performance.
Symptoms of a faulty master cylinder include:
Spongy or sinking brake pedal
Reduced stopping power
Brake fluid leaks
Brake warning light illumination
If a faulty master cylinder is suspected, it is essential to have it inspected and replaced by a qualified mechanic. Continuing to drive with a faulty master cylinder can result in a complete loss of braking ability, significantly increasing the risk of accidents.
Contaminated brake fluid can cause reduced braking performance, corrosion of brake components, and potential brake failure in Honda Civics. Brake fluid is hygroscopic, meaning it absorbs moisture from the atmosphere over time. As moisture accumulates in the brake fluid, it lowers the fluid's boiling point and can lead to corrosion of internal brake components.
Symptoms of contaminated brake fluid include:
Spongy or soft brake pedal
Reduced braking performance
Corrosion of brake components
Discolored or dirty brake fluid
To prevent brake fluid contamination, it is crucial to have the brake fluid inspected and replaced according to the manufacturer's recommended maintenance schedule. This typically involves flushing the old fluid from the system and replacing it with fresh, high-quality brake fluid that meets the vehicle's specifications.
A visual inspection of brake components is the first step in diagnosing brake system issues in Honda Civics. This involves examining the brake pads, rotors, calipers, and brake lines for signs of wear, damage, or leaks. By identifying potential problems early, you can prevent more severe issues from developing and ensure optimal braking performance.
When conducting a visual inspection, look for the following:
Brake pad thickness and wear pattern
Rotor surface condition and thickness
Caliper condition and movement
Brake line condition and signs of leaks
Brake fluid level and appearance
If any issues are identified during the visual inspection, further testing and repairs may be necessary to address the problem and restore proper braking function.
Checking the brake fluid level and condition is an essential part of diagnosing brake system issues in Honda Civics. The brake fluid reservoir is typically located in the engine compartment, near the brake master cylinder. The fluid level should be between the "MIN" and "MAX" marks on the reservoir, and the fluid should be clean and free of contaminants.
If the brake fluid level is low, it may indicate a leak in the brake system or worn brake pads. Low fluid levels can cause a spongy brake pedal and reduced braking performance. If the fluid appears dark, dirty, or contaminated, it may need to be replaced to ensure proper braking function and prevent damage to brake components.
Measuring brake pad thickness is crucial for determining when brake pads need to be replaced in Honda Civics. Brake pads typically have wear indicators that produce a squealing noise when the pads have worn down to a certain thickness. However, measuring the pad thickness directly provides a more accurate assessment of their condition.
To measure brake pad thickness, you will need a brake pad thickness gauge or a caliper. Remove the wheel and locate the brake pads within the caliper assembly. Measure the thickness of the friction material on each pad, and compare it to the manufacturer's recommended minimum thickness. If the pads are at or below the minimum thickness, they should be replaced to ensure optimal braking performance and prevent damage to the rotors.
Inspecting rotors for wear or damage is essential for identifying potential issues that can affect braking performance in Honda Civics. Rotors can become worn, warped, or damaged due to excessive heat, improper installation, or prolonged exposure to moisture and corrosion. To inspect the rotors, remove the wheels and visually examine the rotor surfaces for signs of wear or damage.
Look for the following:
Grooves or scoring on the rotor surface
Uneven wear or thickness variation
Cracks or other structural damage
Rust or corrosion
If the rotors show signs of wear or damage, they may need to be resurfaced or replaced, depending on the severity of the issue. Measuring rotor thickness with a micrometer can help determine if the rotors are within the manufacturer's specifications and safe for continued use.
Testing brake system response and performance is crucial for identifying potential issues and ensuring safe operation of Honda Civics. This involves evaluating the brake pedal feel, stopping distance, and overall braking effectiveness. To test the brake system, find a safe, open area with good traction and no traffic.
Perform the following tests:
Brake pedal feel test: With the engine running, press the brake pedal and observe its feel and response. The pedal should be firm and responsive, with no sponginess or excessive travel.
Stopping distance test: Accelerate the vehicle to a moderate speed (e.g., 30 mph) and apply the brakes firmly. The vehicle should come to a stop in a straight line, without pulling to one side or requiring excessive pedal effort.
Parking brake test: With the vehicle stopped on a slight incline, apply the parking brake and release the foot brake. The parking brake should hold the vehicle in place without slipping.
If any issues are identified during these tests, such as a spongy pedal feel, increased stopping distance, or uneven braking, further diagnosis and repairs may be necessary to address the problem and restore proper braking performance.
Replacing brake pads is a common DIY fix for addressing worn pads and restoring braking performance in Honda Civics. To replace the brake pads, you will need a jack and jack stands, a lug wrench, a caliper piston tool, and a brake pad replacement kit specific to your vehicle's make and model.
Follow these general steps to replace the brake pads:
Safely raise and support the vehicle on jack stands.
Remove the wheels and locate the brake calipers.
Remove the caliper bolts and carefully slide the caliper off the rotor.
Remove the old brake pads from the caliper.
Use the caliper piston tool to compress the caliper piston, making room for the new, thicker pads.
Install the new brake pads into the caliper, ensuring they are properly seated.
Reinstall the caliper and securely tighten the caliper bolts.
Repeat the process on the other wheels as needed.
Reinstall the wheels and lower the vehicle back to the ground.
Pump the brake pedal several times to restore proper brake pedal feel and ensure the pads are seated correctly against the rotors.
After replacing the brake pads, it is essential to break them in properly by avoiding hard braking for the first 100-200 miles. This allows the pads and rotors to develop an even transfer layer, ensuring optimal braking performance and longevity.
Resurfacing or replacing rotors is another common DIY fix for addressing worn, warped, or damaged rotors in Honda Civics. Resurfacing involves using a brake lathe to remove a thin layer of material from the rotor surface, creating a smooth, even braking surface. Replacing rotors involves installing new rotors in place of the old, worn, or damaged ones.
To determine whether resurfacing or replacement is necessary, consider the following factors:
Rotor thickness: Measure the rotor thickness and compare it to the manufacturer's minimum thickness specification. If the rotors are at or below the minimum thickness, they must be replaced.
Rotor condition: Inspect the rotors for deep grooves, cracks, or other structural damage. If the damage is severe, the rotors must be replaced, as resurfacing will not restore their integrity.
If resurfacing is appropriate, follow these general steps:
Remove the rotors from the vehicle.
Mount the rotors on a brake lathe and follow the lathe manufacturer's instructions for resurfacing.
Ensure the resurfaced rotors meet the minimum thickness specification and have a smooth, even surface.
Reinstall the resurfaced rotors and brake pads.
If replacement is necessary, follow these general steps:
Remove the old rotors from the vehicle.
Clean the hub surface to ensure proper rotor seating.
Install the new rotors, ensuring they are properly seated and secured.
Install new brake pads to ensure optimal braking performance and even wear.
After resurfacing or replacing the rotors, it is essential to break in the new pads and rotors properly, as described in the brake pad replacement section.
Bleeding the brake system is a DIY fix for removing air from the brake lines and restoring proper brake pedal feel and performance in Honda Civics. Air can enter the brake system through leaks, during brake component replacement, or due to low brake fluid levels. Bleeding the brakes involves forcing fresh brake fluid through the lines to displace any air bubbles.
To bleed the brakes, you will need a brake bleeding kit, which typically includes a clear tube, a catch bottle, and a wrench that fits the bleeder valves on the brake calipers. You will also need fresh brake fluid that meets the manufacturer's specifications.
Follow these general steps to bleed the brakes:
Safely raise and support the vehicle on jack stands.
Locate the brake fluid reservoir and clean the surrounding area to prevent contamination.
Remove the reservoir cap and fill the reservoir with fresh brake fluid.
Start at the brake caliper farthest from the master cylinder (typically the right rear) and work your way towards the closest caliper (typically the left front).
Connect the clear tube to the bleeder valve on the caliper and place the other end of the tube in the catch bottle.
Have an assistant pump the brake pedal several times and then hold it down.
Open the bleeder valve with the wrench, allowing the fluid and air to flow into the catch bottle. Close the valve before the pedal reaches the floor.
Repeat steps 6-7 until the fluid flowing from the bleeder valve is clear and free of air bubbles.
Move to the next caliper and repeat the process until all four calipers have been bled.
Check the brake fluid level in the reservoir and top it off as needed.
Reinstall the reservoir cap and test the brake pedal feel for firmness and responsiveness.
After bleeding the brakes, it is essential to properly dispose of the old brake fluid, as it is toxic and can harm the environment. If the brake pedal still feels spongy or the braking performance is not restored after bleeding, there may be a more serious issue, such as a master cylinder failure or a leak in the brake lines, which will require professional attention.
Replacing brake fluid is a DIY maintenance task that helps to ensure optimal braking performance and prevent damage to brake components in Honda Civics. Over time, brake fluid absorbs moisture from the atmosphere, which lowers its boiling point and can lead to corrosion of internal brake components. Manufacturers typically recommend replacing brake fluid every 2-3 years or 30,000-45,000 miles, whichever comes first.
To replace the brake fluid, you will need a brake bleeding kit, fresh brake fluid that meets the manufacturer's specifications, and a safe method for disposing of the old fluid.
Follow these general steps to replace the brake fluid:
Safely raise and support the vehicle on jack stands.
Locate the brake fluid reservoir and clean the surrounding area to prevent contamination.
Remove the reservoir cap and use a turkey baster or brake fluid pump to remove as much of the old fluid as possible.
Refill the reservoir with fresh brake fluid.
Bleed the brakes as described in the previous section, starting with the caliper farthest from the master cylinder and working your way towards the closest caliper.
Continue bleeding the brakes until the fluid flowing from each bleeder valve is clean and free of air bubbles.
Check the brake fluid level in the reservoir and top it off as needed.
Reinstall the reservoir cap and test the brake pedal feel for firmness and responsiveness.
After replacing the brake fluid, properly dispose of the old fluid according to local regulations. Regular brake fluid replacement can help extend the life of brake components and ensure optimal braking performance, especially in demanding driving conditions.
Cleaning and lubricating caliper slide pins is a DIY maintenance task that helps to ensure proper caliper movement and even brake pad wear in Honda Civics. Caliper slide pins allow the caliper to move smoothly as the brake pads wear, ensuring even pressure distribution and optimal braking performance. Over time, slide pins can become contaminated with dirt, debris, and corrosion, causing the caliper to bind or stick.
To clean and lubricate the caliper slide pins, you will need a brake caliper slide pin kit, which typically includes a wire brush, brake cleaner, and high-temperature brake caliper grease.
Follow these general steps to clean and lubricate the caliper slide pins:
Safely raise and support the vehicle on jack stands.
Remove the wheels and locate the brake calipers.
Remove the caliper bolts and carefully slide the caliper off the rotor.
Remove the brake pads from the caliper.
Locate the caliper slide pins and remove them from the caliper bracket.
Clean the slide pins with brake cleaner and a wire brush to remove any dirt, debris, or corrosion.
Inspect the slide pins for wear or damage. If the pins are severely worn or damaged, they should be replaced.
Apply a thin layer of high-temperature brake caliper grease to the slide pins, ensuring even coverage.
Reinstall the slide pins into the caliper bracket, making sure they move smoothly and without binding.
Reinstall the brake pads and caliper, securely tightening the caliper bolts.
Repeat the process on the other calipers as needed.
Reinstall the wheels and lower the vehicle back to the ground.
Pump the brake pedal several times to ensure the calipers are seated correctly and the brake pedal feels firm.
Regular cleaning and lubrication of caliper slide pins can help extend the life of brake components, prevent uneven pad wear, and ensure optimal braking performance. It is recommended to perform this maintenance task every time the brake pads are replaced or as needed if the calipers show signs of sticking or binding.
While many brake system repairs can be performed as DIY tasks, some issues may require the expertise and specialized tools of a professional mechanic. Complex brake system repairs that may necessitate seeking professional help include:
Master cylinder replacement: If the master cylinder is leaking, damaged, or failing, it will need to be replaced. This repair involves dealing with the brake fluid and ensuring proper installation and adjustment of the new master cylinder.
Brake line replacement: If the brake lines are corroded, damaged, or leaking, they will need to be replaced. This repair requires specialized tools and knowledge to properly route and secure the new brake lines.
ABS (Anti-lock Brake System) issues: If the ABS warning light is illuminated or the ABS is not functioning properly, it may require professional diagnosis and repair. ABS issues can be caused by faulty sensors, wiring problems, or malfunctioning ABS control modules.
Brake proportioning valve problems: The brake proportioning valve regulates the brake fluid pressure between the front and rear brakes. If this valve is malfunctioning, it can cause uneven braking or loss of rear brake function. Diagnosing and replacing a faulty proportioning valve requires professional expertise.
Brake system leaks: While some brake fluid leaks can be easily identified and repaired, others may be more challenging to locate and fix. Professional mechanics have the knowledge and tools to pinpoint the source of the leak and perform the necessary repairs.
When dealing with complex brake system repairs, it is essential to choose a reputable mechanic or brake specialist who has experience working with Honda Civics. This ensures that the repairs are performed correctly and that the brake system is restored to optimal performance and safety.
Brake system modifications or upgrades are another area where professional help may be necessary. While some upgrades, such as installing high-performance brake pads or rotors, can be performed as DIY tasks, more extensive modifications may require the expertise of a professional mechanic or brake specialist.
Examples of brake system modifications or upgrades that may benefit from professional assistance include:
Big brake kit installation: Big brake kits typically include larger calipers, rotors, and brake pads designed to improve braking performance and heat dissipation. Installing a big brake kit requires ensuring proper fitment, routing of brake lines, and adjustment of the brake bias.
Brake system conversions: Some Honda Civic owners may choose to convert their brake system from drum brakes to disc brakes or from a non-ABS system to an ABS-equipped system. These conversions require significant modifications to the brake system and should be performed by a professional to ensure proper installation and function.
Brake caliper upgrades: Upgrading to high-performance or racing-style brake calipers can improve braking performance and pedal feel. However, these upgrades may require modifications to the brake lines, brackets, and other components, which are best handled by a professional.
Brake master cylinder upgrades: Upgrading to a larger or more powerful brake master cylinder can improve brake system response and performance. However, this upgrade requires ensuring proper fitment and compatibility with the existing brake system components.
When considering brake system modifications or upgrades, it is essential to consult with a professional mechanic or brake specialist who has experience with Honda Civics. They can provide guidance on the best upgrades for your specific needs and ensure that the modifications are performed correctly and safely.
If you have attempted to fix a brake problem on your Honda Civic but the issue persists, it is important to seek professional help to diagnose and resolve the underlying cause. Persistent brake problems can be frustrating and potentially dangerous, as they can compromise your vehicle's safety and performance.
Some common reasons for persistent brake problems after attempted fixes include:
Misdiagnosis of the issue: If the original problem was misdiagnosed, the attempted fix may not have addressed the root cause of the issue. A professional mechanic can perform a thorough inspection and diagnosis to identify the true source of the problem.
Improper repair or installation: If the attempted fix was not performed correctly or if the wrong components were used, the brake problem may persist or even worsen. A professional mechanic can ensure that the repair is performed correctly and that the appropriate components are used.
Multiple underlying issues: In some cases, there may be multiple underlying issues contributing to the brake problem. Addressing only one issue may not resolve the overall problem. A professional mechanic can identify and address all of the contributing factors to ensure a complete repair.
Damage caused by the initial problem: If the initial brake problem was left unaddressed for too long, it may have caused damage to other brake system components. In these cases, additional repairs may be necessary to restore proper braking function.
When seeking professional help for persistent brake problems, be sure to provide the mechanic with a detailed description of the issue, as well as any information about the attempted fixes. This will help the mechanic to quickly identify the problem and develop an effective repair strategy.
Remember, your vehicle's braking system is a critical safety component, and it is essential to ensure that it is functioning properly at all times. If you are unsure about your ability to diagnose or repair a brake problem, it is always best to seek the help of a qualified professional.
Regular brake fluid changes are an essential part of preventive maintenance for Honda Civic brakes. Brake fluid is hygroscopic, meaning it absorbs moisture from the atmosphere over time. As moisture accumulates in the brake fluid, it lowers the fluid's boiling point and can lead to corrosion of internal brake components. This can result in reduced braking performance and potential brake failure.
To prevent these issues, it is recommended to change the brake fluid according to the manufacturer's recommended maintenance schedule. For most Honda Civics, this typically means changing the brake fluid every 2-3 years or 30,000-45,000 miles, whichever comes first.
When changing the brake fluid, it is important to use a high-quality fluid that meets the manufacturer's specifications. This ensures optimal braking performance and protection against corrosion. It is also essential to properly bleed the brake system after changing the fluid to remove any air bubbles that may have been introduced during the process.
Regular brake fluid changes can help to:
Maintain optimal braking performance
Extend the life of brake system components
Prevent corrosion and damage to internal brake parts
Ensure safe and reliable braking under all driving conditions
By staying on top of brake fluid changes as part of your Honda Civic's preventive maintenance routine, you can help to keep your brakes functioning properly and avoid costly repairs down the road.
Incorporating brake component inspections into your Honda Civic's regular tire rotation routine is an effective way to catch potential brake problems early and prevent more serious issues from developing. Tire rotations are typically recommended every 5,000-7,500 miles, depending on your driving habits and the manufacturer's recommendations.
When performing a tire rotation, take the opportunity to inspect the following brake components:
Brake pads: Check the thickness of the brake pads and look for signs of uneven wear. If the pads are worn down to the wear indicators or if they show significant uneven wear, they should be replaced.
Rotors: Inspect the brake rotors for signs of wear, warping, or damage. If the rotors are heavily grooved, warped, or below the minimum thickness specification, they may need to be resurfaced or replaced.
Calipers: Check the brake calipers for signs of leaks, sticking, or uneven movement. If the calipers are not moving smoothly or if there are signs of fluid leaks, they may need to be serviced or replaced.
Brake lines and hoses: Inspect the brake lines and hoses for signs of cracks, leaks, or damage. If any issues are found, the affected components should be replaced immediately.
Brake fluid: Check the brake fluid level and condition. If the fluid is low or appears dirty or contaminated, it may need to be topped off or replaced.
By performing these inspections during regular tire rotations, you can stay on top of your Honda Civic's brake health and address any potential issues before they become more serious. This can help to extend the life of your brake components, maintain optimal braking performance, and ensure your vehicle's safety on the road.
If you are not comfortable performing these inspections yourself, you can have them done by a professional mechanic during your tire rotation service. Many automotive service centers include a basic brake inspection as part of their tire rotation package.
Prompt replacement of worn brake pads and rotors is crucial for maintaining your Honda Civic's braking performance and safety. Brake pads and rotors are designed to wear down over time as they create the friction necessary to slow and stop your vehicle. However, if these components are allowed to wear down too far, it can lead to reduced braking effectiveness, increased stopping distances, and potential damage to other brake system components.
To avoid these issues, it is important to replace brake pads and rotors promptly when they reach the end of their service life. The exact interval at which these components need to be replaced can vary depending on your driving habits, the type of brake pads and rotors installed, and environmental factors such as temperature and humidity.
As a general rule, brake pads should be replaced when they have worn down to the wear indicators, which are small metal tabs embedded in the pad material that make a squealing noise when the pads are nearing the end of their life. If you hear this squealing noise consistently when braking, it is time to have your brake pads inspected and replaced if necessary.
Brake rotors should be replaced when they have become heavily worn, warped, or damaged. Signs that your rotors may need to be replaced include:
Vibration or pulsation in the brake pedal or steering wheel during braking
Visible grooves, scoring, or other damage on the rotor surface
Rotors that are below the minimum thickness specification
In some cases, brake rotors can be resurfaced instead of replaced if they are not too heavily worn or damaged. However, resurfacing can only be done a limited number of times before the rotors become too thin and must be replaced.
By promptly replacing worn brake pads and rotors, you can:
Maintain optimal braking performance and safety
Extend the life of other brake system components
Avoid more costly repairs due to damage caused by worn parts
Ensure your Honda Civic passes safety inspections and meets legal requirements
If you are unsure whether your brake pads or rotors need to be replaced, have them inspected by a qualified mechanic. They can measure the thickness of these components and assess their overall condition to determine if replacement is necessary.
Maintaining the proper brake fluid level is an important aspect of preventive maintenance for your Honda Civic's braking system. Brake fluid plays a critical role in transmitting the force applied to the brake pedal to the brake calipers, which in turn squeeze the brake pads against the rotors to slow and stop the vehicle. If the brake fluid level is too low, it can lead to reduced braking performance, increased stopping distances, and potential damage to brake system components.
To ensure your Honda Civic's brake fluid level remains within the proper range, follow these tips:
Check the brake fluid level regularly: Consult your owner's manual for the recommended interval at which to check the brake fluid level. For most Honda Civics, this is typically done during oil changes or tire rotations.
Locate the brake fluid reservoir: The brake fluid reservoir is usually located near the back of the engine compartment, on the driver's side. It is typically a translucent plastic container with "MIN" and "MAX" level markings on the side.
Inspect the fluid level: With the vehicle parked on a level surface, check that the brake fluid level is between the "MIN" and "MAX" markings on the reservoir. If the level is below the "MIN" mark, brake fluid should be added.
Use the correct brake fluid: When adding brake fluid, it is crucial to use the type specified by the manufacturer. For most Honda Civics, this is DOT 3 or DOT 4 brake fluid. Using the wrong type of fluid can cause damage to the brake system and lead to poor braking performance.
Add brake fluid carefully: When adding brake fluid, be sure to clean the area around the reservoir cap to prevent dirt and debris from entering the system. Add the fluid slowly, checking the level frequently to avoid overfilling. If the level is too high, it can cause the fluid to leak out when the brake pads wear down.
Investigate low fluid levels: If you find that your Honda Civic's brake fluid level is consistently low or dropping rapidly, it may indicate a leak in the brake system. In this case, have the system inspected by a qualified mechanic to identify and repair the source of the leak.
By maintaining the proper brake fluid level, you can help to ensure that your Honda Civic's braking system is functioning optimally and avoid potential safety issues. However, it is important to note that brake fluid level maintenance is just one aspect of a comprehensive brake system preventive maintenance plan. Regular inspections, component replacements, and fluid changes are all necessary to keep your brakes in top condition and ensure your safety on the road.
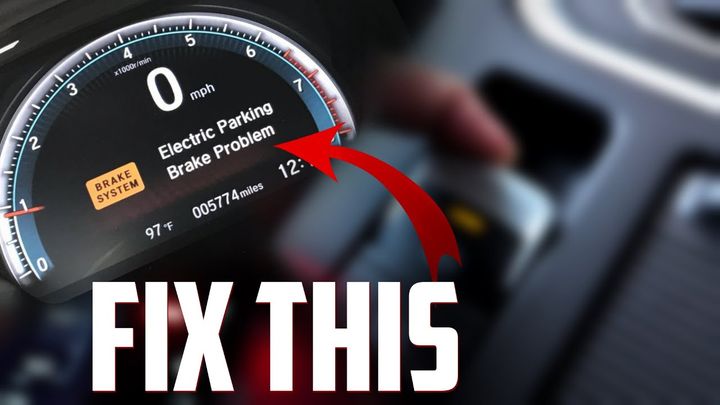
In some cases, a Honda Civic may experience a no-start condition related to the brake system. When this occurs, the vehicle will not crank or start when the key is turned in the ignition. This issue is often accompanied by several warning lights on the dashboard, including:
Brake system warning light
ABS (Anti-lock Brake System) warning light
Parking brake warning light
TPMS (Tire Pressure Monitoring System) warning light
In addition to the warning lights, you may notice that the brake pedal feels stiff or locked when depressed. This can make it difficult or impossible to start the vehicle, as most modern cars require the brake pedal to be pressed in order to engage the starter.
If you encounter these symptoms in your Honda Civic, it is important to diagnose the issue promptly to determine the underlying cause and prevent further damage to the brake system or other vehicle components.
One of the most common causes of a brake system-related no-start condition in a Honda Civic is a weak or dead battery. When the battery is not providing enough power, it can cause a variety of electrical issues throughout the vehicle, including problems with the brake system.
A weak or dead battery can cause the brake system warning light and other warning lights to illuminate on the dashboard, even if there is no actual problem with the brakes themselves. This occurs because the low battery voltage can trigger fault codes in the vehicle's computer system, which in turn activates the warning lights.
In addition to illuminating warning lights, a weak or dead battery can cause the brake pedal to feel stiff or locked. This happens because the brake system relies on electrical power to function properly. When the battery is not providing enough power, the brake pedal may not release fully, making it difficult or impossible to start the vehicle.
If you suspect that a weak or dead battery is causing your Honda Civic's brake system-related no-start condition, there are a few steps you can take to diagnose and resolve the issue:
Check the battery voltage: Using a voltmeter, check the battery voltage with the engine off. A fully charged battery should read around 12.6 volts. If the voltage is below 12.4 volts, the battery may be weak or failing.
Attempt a jump start: If the battery voltage is low, try jump starting the vehicle using a portable jump starter or another vehicle with a good battery. If the vehicle starts and runs normally after a jump start, it is likely that the battery is the culprit.
Test the battery and charging system: If the vehicle starts after a jump but the problem recurs, have the battery and charging system tested by a qualified mechanic. The battery may need to be replaced, or there may be an issue with the alternator or other charging system components.
By addressing a weak or dead battery promptly, you can often resolve a brake system-related no-start condition in your Honda Civic and prevent further issues from developing.
If you have determined that a weak or dead battery is causing your Honda Civic's brake system-related no-start condition, jump starting or replacing the battery will likely resolve the issue. Here's a step-by-step guide to jump starting your Honda Civic:
Position the vehicles: Park the vehicle with the good battery close to your Honda Civic, ensuring that the batteries are close enough for the jumper cables to reach. Make sure both vehicles are turned off and in park or neutral with the parking brake engaged.
Connect the jumper cables:
Connect one end of the red jumper cable to the positive (+) terminal of your Honda Civic's dead battery.
Connect the other end of the red jumper cable to the positive (+) terminal of the good battery.
Connect one end of the black jumper cable to the negative (-) terminal of the good battery.
Connect the other end of the black jumper cable to an unpainted metal surface in your Honda Civic's engine compartment, away from the battery and any moving parts.
Start the vehicle: Start the vehicle with the good battery and let it run for a few minutes. Then, attempt to start your Honda Civic. If the vehicle starts, let it run for at least 15 minutes to help recharge the battery.
Disconnect the jumper cables: Once your Honda Civic is running, disconnect the jumper cables in the reverse order of connection (black cable from your Honda Civic, black cable from the good battery, red cable from the good battery, red cable from your Honda Civic).
If your Honda Civic's battery is old or frequently needs jump starting, it may be time to replace it. When replacing the battery, be sure to choose a replacement that meets or exceeds the manufacturer's specifications for your specific vehicle. It is also important to properly dispose of the old battery, as it contains hazardous materials and can be harmful to the environment if not handled correctly.
After jump starting or replacing the battery, your Honda Civic's brake system warning light and other warning lights should turn off, and the brake pedal should feel normal when depressed. If the issue persists, there may be another underlying problem that requires further diagnosis.
While a weak or dead battery is the most common cause of a brake system-related no-start condition in a Honda Civic, there are other potential issues that can lead to similar symptoms. These include:
Faulty brake switch: The brake switch is responsible for telling the vehicle's computer when the brake pedal is pressed. If this switch is faulty, it may prevent the vehicle from starting, even if the brake pedal is depressed. Symptoms of a faulty brake switch include the brake lights staying on constantly or not turning on at all when the pedal is pressed.
Damaged brake pedal assembly: If the brake pedal assembly is damaged or worn, it may not fully release when the pedal is pressed. This can cause the brake pedal to feel stiff or locked and prevent the vehicle from starting. In some cases, the brake pedal may also feel spongy or sink to the floor when pressed.
Malfunctioning ABS module: The ABS (Anti-lock Brake System) module is responsible for controlling the vehicle's ABS functions. If this module malfunctions, it can cause various issues, including illuminated warning lights and a no-start condition. Diagnosing an ABS module issue typically requires specialized equipment and knowledge.
Corroded or damaged wiring: Over time, the wiring in your Honda Civic's brake system can become corroded or damaged due to exposure to the elements or general wear and tear. This can lead to electrical issues that cause warning lights to illuminate and prevent the vehicle from starting.
If you have ruled out a weak or dead battery as the cause of your Honda Civic's brake system-related no-start condition, it is best to have the vehicle inspected by a qualified mechanic. They can use diagnostic tools and their expertise to pinpoint the underlying issue and recommend the appropriate repairs.
In some cases, these issues may be covered under your Honda Civic's warranty or an extended warranty. Be sure to check your warranty documentation and contact your local Honda dealer for guidance on how to proceed with repairs.
If your Honda Civic is equipped with an electronic parking brake system and you have resolved the underlying issue causing the brake system-related no-start condition (such as replacing a weak or dead battery), you may need to perform a system reset to clear any stored fault codes and turn off the brake system warning light. Here's a step-by-step guide to resetting the electronic parking brake system in your Honda Civic:
Ensure the vehicle is in park: Shift your Honda Civic's transmission into the park position and turn the ignition to the "ON" position (do not start the engine).
Press and hold the brake pedal: Firmly press and hold the brake pedal down with your foot.
Engage the electronic parking brake: While holding the brake pedal down, press and hold the electronic parking brake switch until you hear a clicking sound. This indicates that the parking brake has been engaged.
Release the electronic parking brake: With the brake pedal still pressed, release the electronic parking brake switch. You should hear another clicking sound, indicating that the parking brake has been released.
Repeat the process: Press and hold the electronic parking brake switch again until you hear a clicking sound, then release it. Repeat this process until you have engaged and released the parking brake a total of three times.
Turn the ignition off: After completing the sequence, turn the ignition to the "OFF" position and wait for at least 15 seconds.
Start the vehicle: Turn the ignition back to the "ON" position and start your Honda Civic's engine. The brake system warning light should now be off, and the electronic parking brake system should function normally.
If the brake system warning light remains on or the electronic parking brake system continues to malfunction after performing this reset procedure, there may be a more serious issue that requires professional diagnosis and repair. In this case, it is best to consult a qualified mechanic or your local Honda dealer for further assistance.
It is important to note that this reset procedure may vary slightly depending on your specific Honda Civic model and year. Always refer to your vehicle's owner's manual for the most accurate information and instructions regarding your particular vehicle.
In conclusion, understanding the common symptoms, causes, and fixes for Honda Civic brake system problems is essential for maintaining your vehicle's safety and performance. By familiarizing yourself with the signs of brake issues, such as spongy pedal feel, grinding noises, and reduced stopping power, you can quickly identify potential problems and take appropriate action.
Regular preventive maintenance, such as brake fluid changes, component inspections, and prompt replacement of worn pads and rotors, can help extend the life of your Honda Civic's brake system and prevent more serious issues from developing. When performing brake system repairs or maintenance, always use high-quality parts that meet the manufacturer's specifications and follow proper procedures to ensure optimal results.
If you encounter a brake system-related no-start condition in your Honda Civic, the most likely cause is a weak or dead battery. Jump starting or replacing the battery will often resolve the issue, but it is important to investigate any underlying problems that may have contributed to the battery failure.
For more complex brake system issues or persistent problems, it is best to seek the assistance of a qualified mechanic or your local Honda dealer. They have the expertise, tools, and resources necessary to accurately diagnose and repair your vehicle's brake system, ensuring that it functions safely and reliably.
By staying vigilant, performing regular maintenance, and addressing brake system problems promptly, you can help keep your Honda Civic's brakes in top condition and enjoy peace of mind on the road.
Symptoms of a faulty brake switch include the brake lights staying on constantly or not turning on at all when the pedal is pressed. A faulty switch can also prevent the car from starting.
Diagnosing a malfunctioning ABS module typically requires specialized equipment and knowledge. Common symptoms include illuminated ABS warning lights and issues with the brake system or vehicle startup.
If your Honda Civic experiences persistent brake problems after attempted fixes, it's best to have the vehicle inspected by a qualified mechanic or your local Honda dealer. They can use diagnostic tools and their expertise to pinpoint the underlying issue and recommend appropriate repairs.
For most Honda Civics, it's recommended to change the brake fluid every 2-3 years or 30,000-45,000 miles, whichever comes first. This helps maintain optimal braking performance and prevent corrosion of brake components.
Signs that your Honda Civic's brake rotors need to be replaced include vibration or pulsation in the brake pedal or steering wheel during braking, visible grooves or damage on the rotor surface, and rotors that are below the minimum thickness specification. Warped or heavily worn rotors should be replaced to ensure proper braking performance.
You can drive a Honda Civic with the brake pad warning light on for a short time, as this light is programmed to turn on when some brake pad material is still left. However, it's best to have the brake pads inspected and replaced by a professional as soon as possible to avoid further damage to the brake system.
If your Honda Civic displays a "Brake System Problem" warning message, you should turn off the engine and avoid driving the vehicle. Transport your car to a licensed auto repair shop or your home garage to diagnose and solve the problem.
The easiest way to check for contaminated brake fluid in your Honda Civic is to look at the color of the fluid. If it is dark brown or black instead of the normal clear or amber color, it is likely contaminated and needs to be replaced.
Not promptly replacing worn brake pads and rotors in a Honda Civic can lead to reduced braking effectiveness, increased stopping distances, and potential damage to other brake system components. This can compromise vehicle safety and lead to more costly repairs down the road.
To reset the electronic parking brake system in a Honda Civic after resolving underlying issues, turn the ignition on with the gear in park and foot on the brake pedal, then engage and release the electronic parking brake switch three times, holding it on the third time until you hear two beeps. This should clear any stored fault codes and turn off the brake system warning light.
Miguel started tinkering with car radios as a teenager, fascinated by the intricate dance of wires and circuits. This passion led him to pursue a career as an automotive electrician. For the past 10 years, Miguel has tackled everything from flickering headlights to mysterious electrical gremlins. He thrives on troubleshooting electrical problems and enjoys sharing his knowledge to empower car owners to understand their vehicles better.