
The alternator plays a crucial role in a vehicle's electrical system by charging the battery and powering various components. However, issues with the voltage regulator, which controls the alternator's output, can lead to charging problems. In such cases, bypassing the voltage regulator can serve as a temporary solution to diagnose and troubleshoot the issue.
This guide will walk you through the process of bypassing the voltage regulator, covering the necessary preparations, safety precautions, locating the regulator, the bypass procedure, testing the alternator's output, and understanding the associated risks. Additionally, we'll discuss the importance of proper voltage regulation and when to seek professional assistance.

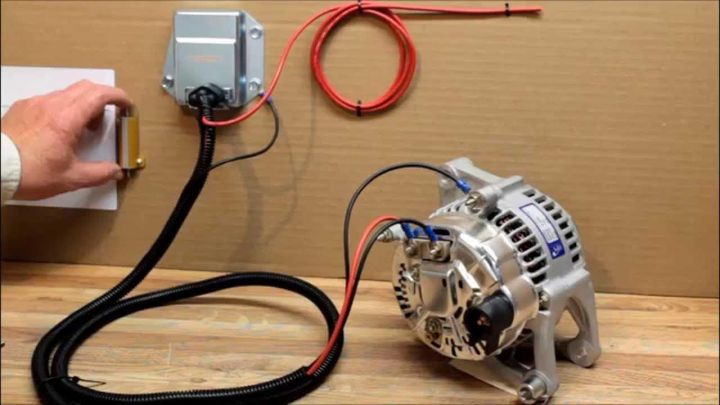
The alternator charging system consists of several components, including the alternator, voltage regulator, battery, and associated wiring. The alternator generates alternating current (AC), which is then converted to direct current (DC) to charge the battery and power the vehicle's electrical components. Voltage regulation is crucial for maintaining the proper charging voltage and preventing overcharging or undercharging of the battery.
Before attempting to bypass the voltage regulator, ensure you have the necessary tools and materials, and take appropriate safety precautions.
| Tool/Material | Purpose |
|---|---|
| Jumper wire | Connect the alternator's field terminal to the battery positive terminal |
| Voltmeter | Monitor the battery voltage and confirm proper charging |
| Basic hand tools | Access the voltage regulator and disconnect the wiring harness connector |
| Precaution | Explanation |
|---|---|
| Disconnect negative battery cable | Prevent short circuits and potential electrical shocks |
| Avoid shorts and sparks | Prevent fires or damage to the electrical system |
| Wear eye protection | Shield your eyes from potential debris or sparks |
The voltage regulator can be found in different locations depending on the vehicle make and model. Common locations include:
Rear alternator housing
Wiring harness connector
Once located, identify the specific terminals for the bypass procedure:
Field (F) terminal: Connection point for the alternator's field winding
Battery positive (B+) terminal: Connection point for the positive battery cable or alternator output wire
Disconnect the wiring harness connector from the voltage regulator.
Using the jumper wire, connect the field (F) terminal on the voltage regulator connector to the battery positive (B+) terminal.
Reconnect the negative battery cable.
After bypassing the voltage regulator, test the alternator's output to determine if the issue lies with the regulator or the alternator itself.
Start the engine and allow it to idle.
Monitor the battery voltage using the voltmeter. A properly charging alternator should produce a voltage reading between 14 and 15 volts.
If the alternator is charging the battery correctly (14-15V) when bypassed, the voltage regulator is likely faulty and needs to be replaced. If the alternator is still not charging the battery, the issue likely lies with the alternator itself or the associated wiring, and further diagnostics or repairs may be necessary.
Running the alternator with a bypassed voltage regulator for an extended period can lead to several risks:
Overcharging the battery, potentially causing premature battery failure or damage
Damaging sensitive electrical components due to excessive voltage
Excessive heat buildup, potentially leading to premature alternator failure
Due to these risks, it's strongly recommended to bypass the voltage regulator only for diagnostic purposes and replace the faulty regulator as soon as possible.
If the bypass procedure confirms a faulty voltage regulator, follow these steps to replace it:
Obtain a replacement voltage regulator that matches the specifications of your vehicle's alternator.
Follow the manufacturer's instructions or a repair manual to properly remove the old voltage regulator and install the new one.
Reconnect the wiring harness connector and any other associated wiring, ensuring secure connections and proper routing.
Bypassing the voltage regulator on an alternator is a useful diagnostic technique when troubleshooting charging system issues. However, it's crucial to understand the importance of proper voltage regulation and the risks associated with running a bypassed system for extended periods. If you encounter any difficulties or uncertainties, seek professional assistance to ensure the safety and longevity of your vehicle's electrical system.
Bypassing the voltage regulator is a temporary solution to diagnose and troubleshoot charging system issues. It allows you to determine if the voltage regulator or the alternator itself is causing the problem.
Running the alternator with a bypassed voltage regulator for an extended period can overcharge the battery, damage sensitive electrical components due to excessive voltage, and cause excessive heat buildup, potentially leading to premature alternator failure.
The voltage regulator is commonly found on the rear alternator housing or the wiring harness connector. Identify the specific terminals for the field (F) and battery positive (B+) connections.
The required tools include a jumper wire, a voltmeter to monitor the battery voltage, and basic hand tools to access the voltage regulator and disconnect the wiring harness connector.
Safety precautions include disconnecting the negative battery cable, avoiding shorts and sparks, and wearing eye protection to shield your eyes from potential debris or sparks.
After bypassing the voltage regulator, start the engine and monitor the battery voltage using a voltmeter. A properly charging alternator should produce a voltage reading between 14 and 15 volts.
If the alternator charges correctly (14-15V) when bypassed, the voltage regulator is likely faulty and needs to be replaced.
If the alternator is still not charging the battery, the issue likely lies with the alternator itself or the associated wiring, and further diagnostics or repairs may be necessary.
To replace a failed voltage regulator, obtain a replacement that matches your vehicle's alternator specifications, follow the manufacturer's instructions or a repair manual to remove the old regulator and install the new one, and reconnect the wiring harness and associated wiring securely.
It is important to replace a faulty voltage regulator as soon as possible to prevent overcharging the battery, damaging sensitive electrical components, and causing excessive heat buildup, which can lead to premature alternator failure.
Miguel started tinkering with car radios as a teenager, fascinated by the intricate dance of wires and circuits. This passion led him to pursue a career as an automotive electrician. For the past 10 years, Miguel has tackled everything from flickering headlights to mysterious electrical gremlins. He thrives on troubleshooting electrical problems and enjoys sharing his knowledge to empower car owners to understand their vehicles better.