
In modern 4-wheel drive (4WD) and all-wheel drive (AWD) vehicles, the transfer case plays a pivotal role in distributing power between the front and rear axles. At the heart of this crucial component lies the encoder motor, also known as the shift motor, responsible for controlling the shifting between various drive modes. A malfunctioning encoder motor can prevent your vehicle from engaging or disengaging 4WD, leaving you stranded in challenging driving conditions. This comprehensive guide will delve into the intricate process of testing and diagnosing issues with the transfer case encoder motor, equipping you with the knowledge and skills to tackle this critical automotive repair.
![]()
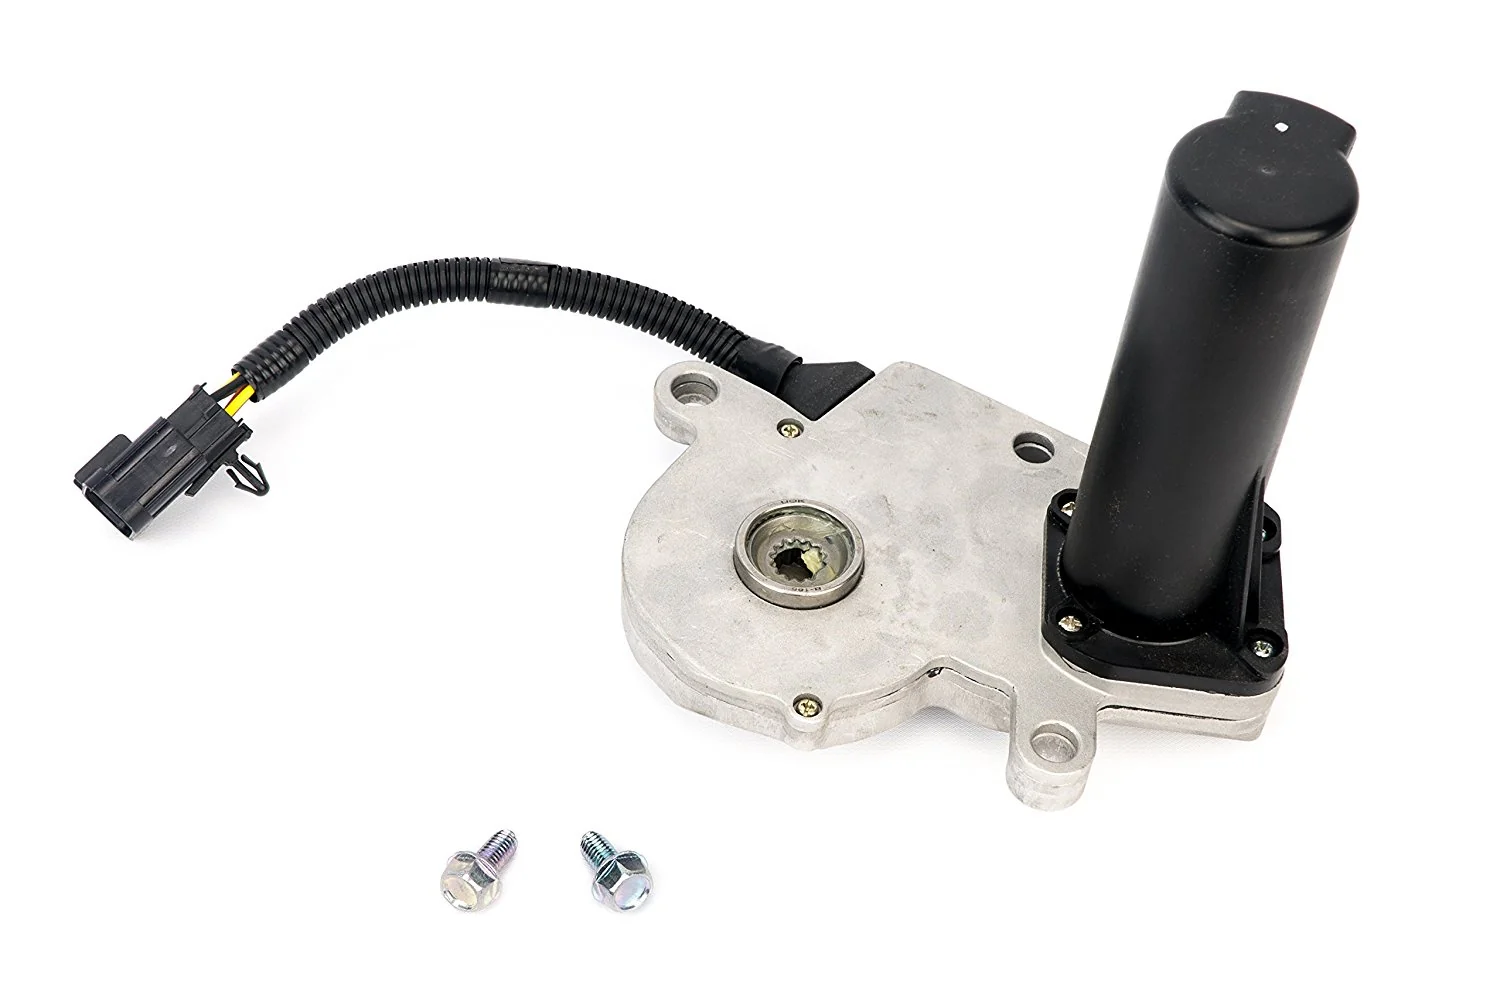
The transfer case encoder motor is an electromechanical device that plays a crucial role in the operation of your vehicle's 4WD system. It receives electrical signals from the vehicle's control module, which dictate its direction of rotation and operation. When you select a different drive mode, the control module sends a signal to the encoder motor, prompting it to actuate the shift mechanism within the transfer case. This mechanism engages or disengages the appropriate components, allowing power to be distributed between the front and rear axles as desired.
A properly functioning encoder motor is essential for the seamless operation of your vehicle's 4WD system. Without it, you may experience various issues, as outlined in the following table:
| Issue | Description |
|---|---|
| Inability to shift between drive modes | The vehicle may be stuck in a particular mode (2WD, 4WD High, or 4WD Low) and unable to switch to others. |
| Illumination of 4WD warning light | The dashboard warning light may illuminate, indicating a problem with the 4WD system. |
| Erratic shifting or engagement | The 4WD system may engage or disengage unexpectedly or shift between modes erratically. |
| Grinding or whirring noises | Unusual noises may emanate from the transfer case area, suggesting excessive wear or binding. |
These symptoms not only indicate a problem with the encoder motor but can also lead to further damage to other components within the transfer case if left unaddressed.
Several factors can contribute to the failure of the transfer case encoder motor, including:
Electrical issues, such as wiring damage or faulty connections
Physical damage to the motor itself, caused by impact or wear
Contamination or lack of maintenance of the transfer case fluid
Wear or binding in other transfer case components, like the shift fork or clutch
Addressing these underlying causes is crucial to prevent recurring issues and ensure the longevity of your vehicle's 4WD system.
Before diving into the testing procedure, it's essential to recognize the telltale signs of a failing encoder motor. By identifying these symptoms early, you can take prompt action and prevent further damage to the transfer case and other drivetrain components.
One of the most obvious indicators of a faulty encoder motor is the inability to shift between 2WD, 4WD High, and 4WD Low modes. If you attempt to switch drive modes and the vehicle remains stuck in its current setting, it could be a sign that the encoder motor is not functioning correctly.
The encoder motor is responsible for actuating the shift mechanism within the transfer case, allowing it to engage or disengage the appropriate components for different drive modes. When the encoder motor fails, this shifting process is disrupted, preventing the vehicle from changing between drive modes as intended.
Most modern vehicles are equipped with a 4WD warning light on the dashboard. This light is designed to illuminate when there is a problem with the transfer case system, including a potential issue with the encoder motor.
The 4WD warning light is typically connected to the vehicle's diagnostic system, which monitors the operation of various components related to the 4WD system. If the system detects a fault or abnormal behavior in the encoder motor or associated components, it will trigger the warning light to alert the driver.
In some cases, a failing encoder motor may cause erratic shifting or engagement of the 4WD system. This could manifest in several ways:
Unexpected shifts between drive modes without user input
The 4WD system engaging or disengaging randomly
Delayed or sluggish response when attempting to shift between modes
These erratic behaviors can be caused by intermittent electrical issues, mechanical binding, or other problems affecting the encoder motor's operation.
If you hear grinding or whirring noises coming from the transfer case area, it could be a sign that the encoder motor or other internal components are experiencing excessive wear or binding. These noises should not be ignored, as they may indicate a more serious underlying issue.
Grinding noises can be caused by worn or damaged gears or bearings within the transfer case, while whirring noises may be indicative of a failing encoder motor or other electrical components. In some cases, these noises may be accompanied by vibrations or other unusual behaviors.
To effectively test the transfer case encoder motor, you'll need to have the following tools on hand:
| Tool | Description |
|---|---|
| Multimeter or Test Light | Used for electrical testing to check for voltage and ground signals on the wiring harness connected to the encoder motor. |
| Jumper Cables or Portable Battery Pack | Allows for direct power testing of the encoder motor by applying an external power source. |
| Basic Hand Tools | A set of sockets, wrenches, and pliers for accessing and potentially removing the encoder motor from the transfer case. |
| Vehicle Repair Manual | Provides specific instructions, wiring diagrams, and torque specifications for your particular make and model. |
Having the right tools is essential for accurately diagnosing and addressing any issues with the transfer case encoder motor.
Once you have the necessary tools and resources, you can begin the process of testing the transfer case encoder motor. Follow these steps carefully to ensure accurate diagnosis and avoid further damage to your vehicle.
![]()
Start by conducting a thorough visual inspection of the encoder motor and its surrounding components. Look for any signs of physical damage, such as cracks, dents, or leaks. Additionally, inspect the wiring harness and connectors for any corrosion, damage, or loose connections.
During the visual inspection, pay close attention to the following areas:
The encoder motor itself: Check for any visible signs of damage, such as cracks, dents, or leaks.
Wiring harness and connectors: Inspect the wiring harness and connectors for any corrosion, damage, or loose connections.
Transfer case housing: Look for any signs of leakage or damage to the transfer case housing, which could indicate potential issues with internal components.
If any physical damage or issues are identified during the visual inspection, it's important to address them before proceeding with further testing or repairs.
Locate the wiring harness that connects to the encoder motor and consult your vehicle's repair manual to identify the specific wires that control its operation. Using a multimeter or test light, check for voltage and ground signals on these wires while attempting to shift between different drive modes. The presence or absence of voltage can help determine if the issue lies with the encoder motor or the control module.
To perform electrical testing, follow these steps:
Locate the wiring harness that connects to the encoder motor.
Consult your vehicle's repair manual to identify the specific wires that control the encoder motor's operation.
Using a multimeter or test light, check for voltage and ground signals on these wires while attempting to shift between different drive modes.
If the expected voltage and ground signals are present, the issue may lie with the encoder motor itself.
If the expected signals are not present, the issue may be with the control module or other electrical components.
Electrical testing can help pinpoint whether the problem is related to the encoder motor or other electrical components in the system.
If the electrical testing doesn't reveal any issues, you can test the encoder motor directly by applying power from a jumper cable or portable battery pack. Disconnect the encoder motor from the vehicle's wiring harness and connect the positive and negative terminals of the power source to the corresponding wires on the encoder motor. The motor should rotate in both directions when power is applied, indicating that it's functioning correctly.
To perform direct power testing, follow these steps:
Disconnect the encoder motor from the vehicle's wiring harness.
Connect the positive terminal of a jumper cable or portable battery pack to the positive wire of the encoder motor.
Connect the negative terminal of the jumper cable or portable battery pack to the negative wire of the encoder motor.
Apply power from the external source.
Observe if the encoder motor rotates in both directions when power is applied.
If the encoder motor rotates in both directions during direct power testing, it indicates that the motor itself is functioning correctly, and the issue may lie with other components or electrical systems.
In some cases, a faulty encoder motor may be a symptom of an underlying issue with other transfer case components, such as a stuck shift fork, worn clutch, or binding linkages. If the encoder motor tests fine but the transfer case still doesn't engage properly, further inspection of these components may be necessary.
Other transfer case components that may contribute to encoder motor issues include:
Shift fork: The shift fork is responsible for engaging and disengaging the transfer case components for different drive modes. If the shift fork is stuck or binding, it can prevent the encoder motor from actuating the shift mechanism properly.
Clutch: The clutch is used to engage or disengage the transfer case components. A worn or damaged clutch can cause issues with the shifting process, affecting the encoder motor's operation.
Linkages: The linkages connect the encoder motor to the shift mechanism within the transfer case. If these linkages are binding or damaged, it can prevent the encoder motor from actuating the shift mechanism correctly.
If any of these components are found to be faulty or worn, they may need to be repaired or replaced to resolve the issue with the encoder motor.
If you're experiencing issues with the transfer case encoder motor, here are some additional troubleshooting tips that can help you identify and resolve the problem:
| Troubleshooting Tip | Description |
|---|---|
| Check for Diagnostic Trouble Codes | Use an OBD-II scanner to check for any diagnostic trouble codes related to the transfer case system. These codes can provide valuable insights into the nature of the issue and help pinpoint the root cause. |
| Inspect for Fluid Leaks or Contamination | Inspect the transfer case for any fluid leaks or contamination, as this can lead to premature failure of internal components, including the encoder motor. Address any leaks or contamination promptly to prevent further damage. |
| Ensure Clean Electrical Connections | Ensure that all grounds and electrical connections related to the transfer case system are clean and secure. Corrosion or loose connections can interfere with the proper operation of the encoder motor and other electrical components. |
| Consider Underlying Transfer Case Issues | If the encoder motor has failed repeatedly, there may be an underlying issue with the transfer case itself, such as a worn or damaged shift sector shaft. In these cases, further inspection and potential repair or replacement of the transfer case may be necessary. |
By following these troubleshooting tips, you can increase your chances of accurately diagnosing and resolving issues with the transfer case encoder motor.
If your testing confirms that the encoder motor is faulty, it will need to be replaced. Here are the general steps for replacement:
Follow the instructions in your vehicle's repair manual to remove the old encoder motor from the transfer case. Take care to transfer any necessary components, such as locating sleeves or gaskets, from the old motor to the new one.
During the removal process, pay close attention to the following:
Disconnect all electrical connections and wiring harnesses from the encoder motor.
Carefully remove any mounting hardware or brackets securing the encoder motor to the transfer case.
Note the orientation and positioning of the encoder motor to ensure proper alignment during installation of the new motor.
Transfer any necessary components, such as locating sleeves or gaskets, from the old motor to the new one to ensure a proper fit and seal.
Install the new encoder motor, ensuring proper alignment and torque specifications. Reconnect the wiring harness and apply dielectric grease to the connectors to prevent corrosion.
When installing the new encoder motor, follow these steps:
Position the new encoder motor in the correct orientation and alignment, as noted during the removal process.
Secure the encoder motor to the transfer case using the appropriate mounting hardware and torque specifications provided in the repair manual.
Reconnect the wiring harness and electrical connections to the new encoder motor.
Apply dielectric grease to the electrical connectors to prevent corrosion and ensure proper electrical contact.
In some cases, you may need to reset or calibrate the new encoder motor to synchronize it with the transfer case position. Consult your vehicle's repair manual or seek professional assistance for this step, as it can be critical for proper operation.
The reset or calibration process may involve the following steps:
Connect a diagnostic tool or scan tool to the vehicle's diagnostic port.
Follow the instructions provided in the repair manual or by the diagnostic tool to initiate the reset or calibration procedure.
The procedure may involve cycling through different drive modes or performing specific actions to synchronize the encoder motor with the transfer case position.
Once the reset or calibration is complete, verify that the encoder motor and transfer case are functioning correctly by testing the shifting between different drive modes.
Proper resetting or calibration is essential to ensure that the new encoder motor operates correctly and in sync with the transfer case position.
To prevent premature failure of the transfer case encoder motor and other components, it's essential to follow the recommended maintenance schedule for your vehicle. This typically includes:
Changing the transfer case fluid at the specified intervals is crucial for maintaining proper lubrication and preventing contamination, which can lead to accelerated wear and failure of internal components.
| Fluid Change Interval | Description |
|---|---|
| Severe Service | Change the transfer case fluid every 15,000 miles (24,000 km) or 12 months, whichever comes first. |
| Normal Service | Change the transfer case fluid every 30,000 miles (48,000 km) or 24 months, whichever comes first. |
Consult your vehicle's owner's manual or maintenance schedule for the specific recommended intervals and fluid types for your make and model.
During routine service, inspect the transfer case and associated components for any signs of wear or damage. Addressing issues promptly can prevent more severe and costly repairs down the line.
Inspection points may include:
Visual inspection of the transfer case housing for leaks or damage
Checking for unusual noises or vibrations during operation
Inspecting the condition of the transfer case fluid for contamination or discoloration
Verifying the proper operation of the encoder motor and shifting between drive modes
Regular inspections can help identify potential issues before they escalate into more significant problems.
If you notice any fluid leaks or other issues with the transfer case system, address them promptly. Ignoring these problems can lead to contamination and further damage, potentially affecting the encoder motor and other components.
Common issues to address include:
Transfer case fluid leaks
Damaged or corroded electrical connections
Worn or binding linkages or shift components
Unusual noises or vibrations during operation
Addressing these issues in a timely manner can help prevent more extensive and costly repairs down the line.
Driving with a malfunctioning transfer case or encoder motor can exacerbate the problem and lead to more severe and costly repairs. If you suspect an issue, have it diagnosed and repaired as soon as possible.
Continuing to operate the vehicle with a malfunctioning transfer case system can result in:
Increased wear and damage to internal components
Potential failure of the encoder motor or other critical components
Increased risk of becoming stranded due to the inability to shift between drive modes
It's essential to address any issues promptly to avoid further damage and ensure the safe and reliable operation of your vehicle's 4WD system.
Maintaining a properly functioning transfer case encoder motor is crucial for ensuring reliable 4WD performance and preventing costly repairs. By following the steps outlined in this comprehensive guide, you can effectively test and diagnose issues with the encoder motor, as well as address any underlying problems with the transfer case system. Regular maintenance and prompt attention to any warning signs can go a long way in extending the lifespan of your vehicle's drivetrain components. If you encounter any challenges or have concerns, it's always recommended to consult a professional mechanic for further assistance.
A transfer case distributes power between the front and rear axles, while a differential allows the wheels on the same axle to rotate at different speeds when turning.
Yes, since the transfer case is connected to the transmission, issues with the encoder motor can potentially affect transmission operation and cause related problems.
If your vehicle is a 4WD or AWD model, it will have a transfer case. Most 2WD vehicles do not have a transfer case.
While possible for experienced mechanics, replacing the encoder motor is a complex task that requires specialized tools and knowledge. It's generally recommended to have it done by a professional.
Continuing to drive with a faulty encoder motor can lead to further damage to the transfer case, transmission, and other drivetrain components, resulting in costly repairs.
The replacement process can take several hours, depending on the vehicle make and model, as well as the mechanic's experience and any additional issues discovered during the repair.
It's not recommended to drive with a faulty encoder motor, as it can cause further damage and potentially leave you stranded if the 4WD system fails to engage or disengage properly.
Signs of low transfer case fluid include difficulty shifting between drive modes, grinding or whirring noises, and illumination of the 4WD warning light.
The recommended interval for changing the transfer case fluid varies by vehicle make and model, but it's typically between 30,000 to 50,000 miles or every 2-3 years.
No, it's important to use the specific fluid recommended by the vehicle manufacturer for your transfer case, as using the wrong fluid can cause damage or improper operation.
Sarah isn't your average gearhead. With a double major in Mechanical Engineering and Automotive Technology, she dived straight into the world of car repair. After 15 years of turning wrenches at dealerships and independent shops, Sarah joined MICDOT to share her expertise and passion for making cars run like new. Her in-depth knowledge and knack for explaining complex issues in simple terms make her a valuable asset to our team.