
In modern automobiles, the Engine Control Unit (ECU) plays a vital role in managing various engine and vehicle systems. This electronic module receives input signals from sensors, processes the data, and controls actuators like fuel injectors and ignition coils. Ensuring the ECU functions correctly is crucial for optimal engine performance, fuel efficiency, and emissions control.
Regular ECU testing and diagnostics are recommended, and a multimeter is an essential tool for this task. This guide will walk you through the process of testing your vehicle's ECU with a multimeter, enabling you to perform DIY diagnostics and maintain your car's optimal performance.

The ECU is the brain of your vehicle's engine management system. It monitors and controls various engine and vehicle components based on input signals from sensors like the throttle position sensor, coolant temperature sensor, and crankshaft position sensor.
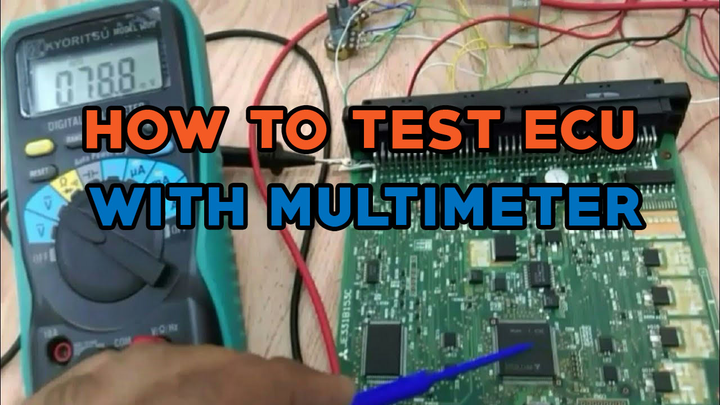
A multimeter is a versatile instrument that can measure electrical parameters such as voltage, resistance, and continuity, making it indispensable for automotive diagnostics and ECU testing.
Before beginning ECU testing, follow these safety precautions:
| Safety Precaution | Description |
|---|---|
| Personal Protective Equipment (PPE) | Wear safety glasses and gloves. |
| Vehicle Positioning | Park on a level surface with the parking brake engaged. |
| Battery Disconnection | Disconnect the negative battery terminal to prevent electrical shorts or accidental engine starts. |
| Manufacturer Guidelines | Follow the manufacturer's instructions and safety guidelines. |
Gather the required tools and equipment:
Digital multimeter
Vehicle repair manual or wiring diagrams
Basic hand tools (pliers, screwdrivers, etc.)
Jumper wires (if needed)
OBD-II scanner or diagnostic tool (for reading fault codes)
Locate the ECU and access the wiring harness by consulting the repair manual or wiring diagrams. Familiarize yourself with the wiring diagrams and manufacturer specifications to interpret the multimeter readings accurately.
Inspect the wiring harness and connectors for any signs of:
Frayed or broken wires
Corroded or damaged connectors
Loose or disconnected wires
Chafed or pinched wiring
Use the multimeter to test the continuity of the circuits. A continuous circuit should show a low resistance value or an audible tone (if the multimeter has a continuity beeper). Check the integrity of the connectors by testing for continuity between the connector pins and the corresponding wires.
The ECU requires a stable power supply and ground connection to function correctly. Test the power circuit by probing the power supply wire or pin on the ECU connector with the multimeter set to measure voltage. The reading should match the vehicle's battery voltage, typically around 12 volts.
To test the ground circuit, measure the voltage or resistance between the ground wire or pin and a known good ground point on the vehicle. The ground circuit should read close to 0 volts or have a very low resistance value.
The ECU receives input signals from various sensors, such as:
| Sensor | Signal Type | Testing Method |
|---|---|---|
| Throttle Position Sensor | Voltage | Measure voltage across sensor signal wire and ground wire while operating the sensor. |
| Coolant Temperature Sensor | Resistance | Disconnect the sensor and measure resistance directly across the terminals while simulating operating conditions. |
Verify that the sensor input signals change smoothly and correspond to the manufacturer's specifications as you operate or simulate the sensor's conditions.
The ECU controls actuators like fuel injectors and ignition coils based on sensor inputs. Test resistance-based actuators (e.g., fuel injectors) by disconnecting the actuator and measuring its resistance directly across the terminals.
For voltage-based actuators (e.g., ignition coils), measure the voltage drop across the actuator circuit with the engine running and the multimeter set to the voltage mode. The voltage reading should fluctuate as the ECU controls the actuator.
Connect an OBD-II scanner or diagnostic tool to the vehicle's diagnostic port to access fault codes stored in the ECU's memory. These codes can help identify specific issues or malfunctioning components.
Common fault codes related to the ECU and its associated components include:
P0101: Mass Air Flow (MAF) sensor circuit range/performance problem
P0171: System too lean (Bank 1)
P0300: Random/Multiple Cylinder Misfire Detected
P0335: Crankshaft Position (CKP) sensor circuit malfunction
P0420: Catalyst System Efficiency Below Threshold (Bank 1)
Consult the vehicle's repair manual or online resources to interpret the fault codes and address the underlying issues.
Compare multimeter readings to the manufacturer's specifications throughout the testing process.
Incorporate regular ECU testing and maintenance into your routine to prevent potential issues.
Seek professional assistance if you encounter complex problems beyond your skill level or if the issue persists despite your efforts.
Testing the ECU with a multimeter is an essential aspect of automotive diagnostics and maintenance. By following the steps outlined in this guide, you can identify potential issues with the ECU, its circuits, and connected components, ensuring optimal engine performance and vehicle operation.
Remember to prioritize safety, familiarize yourself with the vehicle's wiring diagrams and manufacturer specifications, and seek professional assistance when necessary. Regular ECU testing and maintenance can help prevent costly repairs and extend the lifespan of your vehicle's components.
The purpose is to diagnose potential issues with the ECU, its circuits, and connected components, ensuring optimal engine performance and vehicle operation. It helps identify problems before they become more severe.
Wear personal protective equipment, park the vehicle on a level surface with the parking brake engaged, and disconnect the negative battery terminal to prevent electrical shorts or accidental engine starts.
To test the power circuit, measure the voltage at the ECU's power supply wire or pin, which should match the battery voltage. For the ground circuit, measure the voltage or resistance between the ground wire/pin and a known good ground point, which should be close to 0 volts or very low resistance.
Checking sensor inputs ensures that the ECU is receiving accurate signals from various sensors, such as the throttle position sensor and coolant temperature sensor, which are crucial for proper engine management.
Disconnect the actuator and measure its resistance directly across the terminals. Compare the reading to the manufacturer's specifications.
Checking for fault codes stored in the ECU's memory can help identify specific issues or malfunctioning components, providing valuable diagnostic information.
The essential tools include a digital multimeter, vehicle repair manual or wiring diagrams, basic hand tools, jumper wires (if needed), and an OBD-II scanner or diagnostic tool for reading fault codes.
Regular ECU testing and maintenance should be incorporated into your routine to prevent potential issues and ensure optimal vehicle performance.
If you encounter complex problems beyond your skill level or if the issue persists despite your efforts, it is advisable to seek professional assistance from a qualified mechanic or technician.
While the general principles of ECU testing with a multimeter are applicable to most vehicles, it is essential to consult the manufacturer's specific guidelines and specifications for your particular vehicle make and model.
Miguel started tinkering with car radios as a teenager, fascinated by the intricate dance of wires and circuits. This passion led him to pursue a career as an automotive electrician. For the past 10 years, Miguel has tackled everything from flickering headlights to mysterious electrical gremlins. He thrives on troubleshooting electrical problems and enjoys sharing his knowledge to empower car owners to understand their vehicles better.