
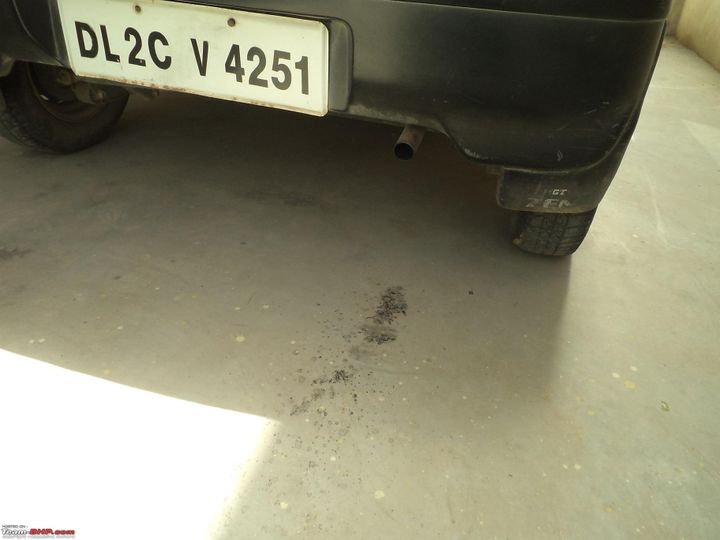
Seeing oil dripping or leaking from the exhaust pipe of your vehicle can be an alarming sight and a clear indication that something is wrong with the engine. The exhaust system is designed to expel the byproducts of combustion, and the presence of oil in this system is abnormal and requires immediate attention. Oil leaking into the exhaust can lead to various issues, including increased emissions, potential fire hazards, and even engine damage if left unaddressed.
Let me assure you, this problem is not uncommon, and there are several potential causes behind it. In this article, I'll guide you through the main reasons, troubleshooting steps, repair instructions, preventive measures, and cost estimates associated with this issue. By the end, you'll have a better understanding of what's happening under the hood and how to address it effectively.
Oil leaking from the exhaust can be caused by various issues within the engine. Here are the main culprits:
| Cause | Description |
|---|---|
| Failed Valve Seals/Guides | Valve seals prevent oil from entering the combustion chamber. When these seals or valve guides fail, oil can leak into the cylinders and get burned, ultimately exiting through the exhaust. This issue is often accompanied by a noticeable blue smoke from the tailpipe. |
| Worn Piston Rings | Piston rings create a seal between the piston and cylinder wall, preventing oil from seeping into the combustion chamber. However, if these rings become worn or broken, they can no longer maintain an effective seal, allowing oil to enter the cylinders and mix with the exhaust gases, resulting in blue smoke. |
| Blown Head Gasket | The head gasket acts as a seal between the engine block and cylinder head. If this gasket fails, oil can leak into the cylinders and mix with the exhaust gases, causing a visible oil leak from the exhaust pipe. |
| Clogged PCV System | The Positive Crankcase Ventilation (PCV) system is responsible for regulating the pressure within the crankcase. When this system becomes clogged, it can force oil into the intake manifold, which then gets burned and exits through the exhaust. |
| Failed Turbocharger Seals | In turbocharged engines, oil is used to lubricate the turbocharger. If the seals around the turbocharger fail, oil can leak into the exhaust housing, leading to an oil leak from the exhaust pipe. |
It's important to note that these issues can occur individually or in combination, making it crucial to properly diagnose the root cause before attempting any repairs.
Before diving into repairs, it's essential to identify the root cause of the oil leak. Here are some troubleshooting steps you can take:
Inspect the Exhaust Pipe: Start by visually inspecting the exhaust pipe for any signs of oil dripping from the tailpipe or turbocharger. Oil has a distinct thick, sticky texture and smell, which can help you distinguish it from water condensation.
Check for Smoke Color: Pay attention to the color of the smoke coming from the exhaust. Blue smoke is a telltale sign of burning oil, while white smoke may indicate a coolant leak or a blown head gasket.
Perform a Leak Down Test: A leak down test can help identify which cylinder(s) is allowing compression to leak, indicating worn piston rings or valve seals. This test is typically performed by a professional mechanic using specialized equipment.
During a leak down test, compressed air is introduced into each cylinder while the engine is turned off. The mechanic then measures the amount of air leaking past the piston rings, valve seals, and head gasket. This information helps pinpoint the source of the leak.
Check the PCV System: Remove the oil filler cap while the engine is running. If you notice excessive air flow or a fuel smell, it could be an indication of a clogged PCV system.
The PCV system is designed to vent crankcase gases back into the engine's intake system. When it's clogged, these gases can't escape properly, leading to increased crankcase pressure and potential oil leaks.
Inspect the Turbocharger: If your vehicle is turbocharged, inspect the turbocharger housing for any signs of oil leaks. Additionally, check for excessive shaft play, which may indicate failed turbocharger seals.
Turbochargers rely on a constant supply of oil for lubrication and cooling. If the seals fail, oil can leak into the exhaust housing and exit through the exhaust pipe.
Once you've identified the root cause of the oil leak, it's time to address the issue. Here are some repair instructions for the most common causes:
Replacing faulty valve seals or guides requires removing the cylinder head. This is a complex job that should be performed by a professional mechanic following the manufacturer's procedures.
The process typically involves:
Removing the cylinder head from the engine block.
Disassembling the cylinder head and inspecting the valve guides and seals.
Replacing any worn or damaged components.
Reassembling the cylinder head and installing it back onto the engine block.
Adjusting the valve clearances and performing any other necessary adjustments.
Replacing worn piston rings involves removing the cylinder head and pistons. This is an extensive labor-intensive process that requires specialized tools and expertise.
The steps generally include:
Removing the cylinder head and pistons from the engine block.
Inspecting the cylinder walls for any damage or excessive wear.
Installing new piston rings onto the pistons.
Reassembling the pistons and installing them back into the engine block.
Reinstalling the cylinder head and performing any necessary adjustments.
Replacing the head gasket is a complex job that requires removing the cylinder head and thoroughly cleaning all mating surfaces. It's crucial to follow the manufacturer's instructions to ensure proper installation and prevent future leaks.
The process typically involves:
Removing the cylinder head from the engine block.
Cleaning the mating surfaces on the engine block and cylinder head to remove any debris or gasket material.
Installing a new head gasket according to the manufacturer's specifications.
Reinstalling the cylinder head and torquing the bolts to the specified values in the correct sequence.
Performing any necessary adjustments or repairs to related components.
Addressing a clogged PCV system typically involves cleaning or replacing the PCV valve and related components, as per the service manual.
The steps may include:
Locating and removing the PCV valve from the engine.
Inspecting the valve and related hoses or ports for any blockages or damage.
Cleaning or replacing the PCV valve and any other necessary components.
Reinstalling the PCV valve and ensuring all connections are secure.
If the issue lies with the turbocharger seals, it may be necessary to remove and overhaul the turbocharger to replace the failed seals. This process requires strict adherence to the manufacturer's instructions.
The general steps involve:
Removing the turbocharger from the engine.
Disassembling the turbocharger and inspecting the seals and other components.
Replacing any worn or damaged seals and components.
Reassembling the turbocharger and ensuring proper lubrication and clearances.
Reinstalling the turbocharger onto the engine and connecting all necessary components.
It's important to note that these repair procedures can be complex and may require specialized tools and knowledge. If you're not confident in your abilities, it's recommended to seek the assistance of a professional mechanic to ensure the job is done correctly and avoid further damage to your vehicle.
While repairs can address the immediate issue, it's essential to take preventive measures to avoid future oil leaks and minimize the risk of engine damage. Here are some tips:

Regular Oil and Filter Changes: Perform regular engine oil and filter changes as per the manufacturer's recommendations. Fresh oil and a clean filter can help prevent excessive wear and tear on engine components.
Avoid Overfilling: Avoid overfilling the engine with oil, as it can cause excessive crankcase pressure and potentially force oil into the combustion chamber.
Address Overheating Issues: Address any engine overheating issues promptly, as excessive heat can damage gaskets and seals, leading to oil leaks.
Follow Break-in Procedures: Follow the break-in procedures for a new or rebuilt engine to properly seat the piston rings and ensure optimal sealing.
Regular Inspections and Maintenance: Inspect and replace worn engine components during scheduled maintenance intervals to prevent further damage and leaks.
The cost of repairing an oil leak can vary significantly depending on the underlying cause and the extent of the damage. Here are some approximate cost ranges:
| Repair | Cost Range |
|---|---|
| Valve Seals/Guides | $500 - $1,500 |
| Piston Rings | $1,000 - $3,000 |
| Head Gasket | $1,200 - $2,500 |
| PCV System | $100 - $300 |
| Turbocharger Seals | $500 - $1,500 |
These costs include both parts and labor. It's essential to address oil leaks promptly, as ignoring them can lead to further engine damage and significantly higher repair costs in the long run.
Seeing oil dripping from your exhaust pipe can be a concerning sight, but it's a problem that can be resolved with the right diagnosis and repairs. By understanding the main causes, troubleshooting steps, repair instructions, and preventive measures, you can take proactive steps to address the issue and maintain the health of your engine.
Remember, regular maintenance and addressing issues promptly can go a long way in preventing costly repairs down the line. If you're ever unsure about the cause of an oil leak or the necessary repairs, don't hesitate to consult with a professional mechanic. Their expertise and experience can provide valuable guidance and ensure that your vehicle is running smoothly and safely.
Blue smoke indicates that the engine is burning oil. This is usually caused by worn valve seals, piston rings, or a faulty turbocharger seal allowing oil to enter the combustion chambers.
Yes, a clogged positive crankcase ventilation (PCV) valve can cause excessive crankcase pressure, forcing oil to leak past seals and gaskets.
Signs of a blown head gasket include white smoke from the exhaust, coolant loss without any visible leaks, a milky substance in the oil, and a sweet smell from the exhaust.
No, it is not recommended to drive with an oil leak as it can lead to engine damage from lack of lubrication and overheating.
Oil leaking from the valve cover is typically caused by a deteriorated or improperly installed valve cover gasket that needs replacement.
Inspect the turbocharger housing for any signs of oil leaks, and check for excessive shaft play which may indicate failed turbocharger seals.
Yes, overfilling the engine with too much oil can create excessive crankcase pressure, forcing oil to leak past seals and gaskets.
Follow the manufacturer's recommended oil change intervals to prevent oil leaks caused by contaminated or low-viscosity oil.
The cost can vary significantly depending on the cause, ranging from $100-$300 for a PCV valve replacement to $1,000-$3,000 for major repairs like replacing piston rings or a head gasket.
Stop leak additives can help condition and swell old gaskets as a temporary fix for minor leaks, but they do not address the root cause which requires proper repairs.
Sarah isn't your average gearhead. With a double major in Mechanical Engineering and Automotive Technology, she dived straight into the world of car repair. After 15 years of turning wrenches at dealerships and independent shops, Sarah joined MICDOT to share her expertise and passion for making cars run like new. Her in-depth knowledge and knack for explaining complex issues in simple terms make her a valuable asset to our team.