
If you're wondering how to tell if you need to bleed your brakes, there are several key signs to look out for. Brake bleeding is an essential maintenance task that helps ensure your vehicle's braking system is functioning properly and safely. In this article, we'll explore the importance of brake maintenance, provide a brief overview of brake bleeding, and dive into the 10 warning signs that indicate it's time to bleed your brakes.

Maintaining your vehicle's brakes is crucial for ensuring the safety of you, your passengers, and other road users. Regular brake maintenance, including brake fluid changes and bleeding, helps keep your braking system in optimal condition, providing reliable stopping power when you need it most.

Brake bleeding is the process of removing air bubbles from the brake lines and ensuring that the brake fluid is clean and free of contaminants. When air enters the brake system, it can cause a spongy or soft brake pedal feel, reduced braking performance, and even complete brake failure in extreme cases.
A spongy or soft brake pedal is one of the most common signs that your brake system needs to be bled. This occurs when air bubbles enter the brake lines, compressing under pressure and reducing the hydraulic force transmitted to the brake calipers or wheel cylinders.
To identify a spongy brake pedal, simply press down on the brake pedal and observe how it feels. If the pedal feels soft, sinks to the floor, or requires more pressure than usual to engage the brakes, it's likely that there is air in the brake lines, and the system needs to be bled.
Reduced braking performance can manifest in several ways, such as longer stopping distances, increased pedal travel, or a lack of confidence in the brakes' ability to slow or stop the vehicle effectively. If you notice any of these symptoms, it's essential to have your brakes inspected and bled if necessary.
Driving a vehicle with reduced braking performance puts you, your passengers, and other road users at risk. Longer stopping distances and inconsistent brake feel can lead to accidents, especially in emergency situations where quick and decisive braking is required.
Regularly checking your brake fluid level is an important part of maintaining your vehicle's braking system. The brake fluid reservoir is typically located near the brake master cylinder, under the hood. The reservoir should have "MIN" and "MAX" markings, indicating the acceptable range for the brake fluid level.
A low brake fluid level can be caused by several factors, including:
Worn brake pads
Leaking brake lines or calipers
Moisture contamination
Neglected brake fluid changes
If you notice that your brake fluid level is consistently low, it's crucial to have your braking system inspected by a qualified mechanic to identify and address the underlying cause.
Brake fluid should be clear or slightly amber in color. If you notice that your brake fluid appears dark, cloudy, or has particles floating in it, this is a sign that the fluid is contaminated and needs to be replaced.
Contaminated brake fluid can have several negative effects on your braking system, including:
Reduced braking performance
Increased wear on brake components
Corrosion of brake lines and calipers
Lowered boiling point, leading to brake fade
To ensure optimal braking performance and longevity of your brake components, it's essential to have contaminated brake fluid flushed and replaced with fresh, clean fluid.
Air can enter the brake system through various means, such as:
Worn or damaged brake lines
Leaking brake calipers or wheel cylinders
Improper brake fluid changes
Moisture contamination
When air is present in the brake lines, you may experience the following symptoms:
Spongy or soft brake pedal feel
Increased brake pedal travel
Reduced braking performance
Inconsistent brake feel
If you suspect that there is air in your brake lines, it's crucial to have the system bled by a qualified mechanic to restore proper braking performance.
Brake fluid change intervals vary depending on the make and model of your vehicle, as well as your driving habits. As a general rule, it's recommended to change your brake fluid every 2-3 years or 30,000-45,000 miles, whichever comes first. However, it's always best to consult your vehicle's owner's manual for specific recommendations.
Neglecting regular brake fluid changes can lead to several issues, including:
Moisture contamination, lowering the fluid's boiling point
Corrosion of brake components
Reduced braking performance
Increased wear on brake parts
To ensure the longevity and reliability of your braking system, it's essential to adhere to the recommended brake fluid change intervals and have the system bled when necessary.
Increased brake pedal travel occurs when you need to press the brake pedal further than usual to engage the brakes. This can be caused by several factors, including:
Air in the brake lines
Worn brake pads
Leaking brake calipers or wheel cylinders
Faulty brake master cylinder
To measure brake pedal travel, follow these steps:
With the engine off, press the brake pedal firmly and measure the distance from the pedal's resting position to the floor.
Start the engine and press the brake pedal firmly again, measuring the distance from the pedal's resting position to the floor.
Compare the two measurements. If the pedal travel is significantly greater with the engine running, it's likely that there is an issue with your braking system that needs to be addressed.
If you notice increased brake pedal travel, it's essential to have your brakes inspected and bled if necessary to restore proper braking performance.
Brake fade is a temporary reduction in braking performance that occurs when the brake components overheat. This can happen during prolonged or aggressive braking, such as when descending a steep hill or during track driving.
Brake fade can be caused by several factors, including:
Overheated brake pads and rotors
Moisture contamination in the brake fluid
Improper brake fluid type
Worn or damaged brake components
If you experience frequent brake fade, it's essential to have your braking system inspected and serviced to ensure optimal performance and safety.
Brake fluid leaks can be identified by visually inspecting your brake lines, calipers, and wheel cylinders for signs of wetness or dripping fluid. Brake fluid leaks can also be detected by noticing a low brake fluid level in the reservoir or a puddle of fluid under your vehicle when parked.
Brake fluid leaks pose a serious safety risk, as they can lead to:
Reduced braking performance
Complete brake failure
Damage to brake components
Potential fire hazard due to the flammability of brake fluid
If you suspect a brake fluid leak, it's crucial to have your braking system inspected and repaired immediately by a qualified mechanic.
Brake fluid is hygroscopic, meaning it readily absorbs moisture from the air. As moisture accumulates in the brake fluid, it lowers the fluid's boiling point and can lead to corrosion of brake components. This can result in reduced braking performance, especially under heavy braking conditions.
Moisture content in brake fluid can be measured using a brake fluid tester, which determines the fluid's boiling point. A lower boiling point indicates a higher moisture content. Many automotive repair shops and brake specialists offer brake fluid testing services to help determine if your brake fluid needs to be replaced.
If your brake fluid has a high moisture content, it's essential to have the system flushed and bled with fresh, clean brake fluid to restore optimal braking performance and protect your brake components from corrosion.
| Warning Sign | Description |
|---|---|
| Spongy or soft brake pedal | Brake pedal feels soft, spongy, or sinks to the floor when pressed |
| Reduced braking performance | Brakes are less responsive, requiring more effort to slow or stop the vehicle |
| Low brake fluid level | Brake fluid level in the reservoir drops below the "MIN" mark |
| Dark or contaminated brake fluid | Brake fluid appears dark, cloudy, or has floating particles |
| Air in the brake system | Brake pedal feels spongy or soft, reduced braking performance |
As part of your vehicle's preventive maintenance schedule, it's recommended to have your brakes inspected and bled according to the manufacturer's guidelines. This typically involves a brake fluid change and system bleed every 2-3 years or 30,000-45,000 miles, whichever comes first.
Any time you replace brake components, such as brake pads, calipers, or lines, it's essential to bleed the brakes to ensure that any air introduced into the system during the repair process is removed. This helps restore proper braking performance and ensures the safety of your vehicle.
If you notice any of the warning signs discussed in this article, such as a spongy brake pedal, reduced braking performance, or contaminated brake fluid, it's crucial to have your brakes inspected and bled as soon as possible. Ignoring these symptoms can lead to further damage to your braking system and compromise your vehicle's safety.
To perform a brake bleeding, you'll need the following essential tools:
Brake fluid (consult your vehicle's owner's manual for the correct type)
Brake bleeder wrench
Clear plastic tubing
Empty container for collecting old brake fluid
Safety glasses and gloves
In addition to the essential tools, there are several optional tools that can make the brake bleeding process easier and more efficient:
One-person brake bleeder kit
Vacuum brake bleeder
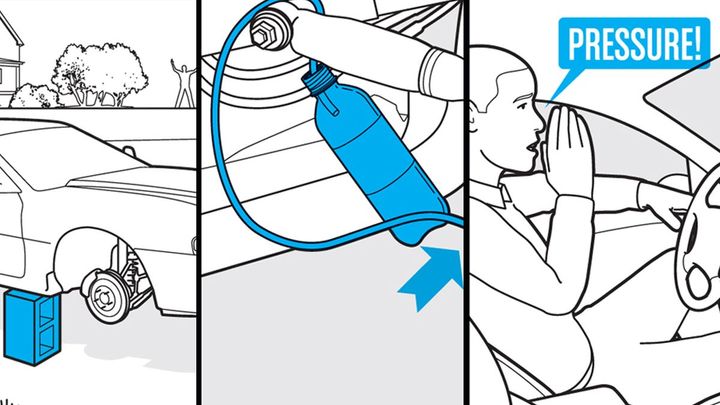
Pressure brake bleeder
Brake fluid tester
While these tools are not strictly necessary, they can save time and effort, especially if you plan on bleeding your brakes regularly or working on multiple vehicles.
Before beginning the brake bleeding process, it's essential to prepare your vehicle:
Ensure the vehicle is on a level surface and the engine is cool.
Remove the brake fluid reservoir cap and check the fluid level. If necessary, add fresh brake fluid to bring the level up to the "MAX" line.
Locate the brake bleeders on each wheel. The bleeders are typically located on the back of the brake calipers or wheel cylinders.
To bleed manual brakes, follow these steps:
Start at the wheel furthest from the master cylinder (usually the right rear) and work your way towards the closest wheel (usually the left front).
Connect the clear plastic tubing to the bleeder valve and place the other end into an empty container.
Have an assistant press and hold the brake pedal down.
Open the bleeder valve with the wrench, allowing the old fluid and air to flow out. Close the valve before the pedal reaches the floor.
Repeat steps 3 and 4 until the fluid flowing from the bleeder is clear and free of air bubbles.
Move to the next wheel and repeat the process until all four wheels have been bled.
Check the brake fluid level in the reservoir and top off if necessary.
Bleeding brakes on vehicles equipped with anti-lock braking systems (ABS) may require additional steps or special equipment. Consult your vehicle's owner's manual or a professional mechanic for specific instructions on bleeding ABS-equipped brakes.
| Wheel Order | Brake Component |
|---|---|
| 1 | Right Rear |
| 2 | Left Rear |
| 3 | Right Front |
| 4 | Left Front |
When bleeding brakes, it's crucial to take safety precautions to protect yourself and your vehicle:
Wear safety glasses and gloves to avoid contact with brake fluid, which can irritate skin and eyes.
Place a protective cover over painted surfaces to prevent brake fluid from damaging the paint.
Ensure the vehicle is on a level surface and the wheels are chocked to prevent rolling.
Brake fluid is a hazardous material and must be disposed of properly. Never pour used brake fluid down the drain or onto the ground. Instead, collect the old fluid in a sealed container and take it to a certified recycling center or automotive repair shop for proper disposal.
There are several types of brake fluid, each with specific properties and compatible with different braking systems. The most common types are:
DOT 3
DOT 4
DOT 5
DOT 5.1
It's essential to use the correct type of brake fluid specified in your vehicle's owner's manual to ensure optimal braking performance and prevent damage to brake components.
| Brake Fluid Type | Characteristics | Applications |
|---|---|---|
| DOT 3 | Minimum dry boiling point 205°C, minimum wet boiling point 140°C | Older vehicles, standard brake systems |
| DOT 4 | Minimum dry boiling point 230°C, minimum wet boiling point 155°C | Newer vehicles, high-performance brake systems |
| DOT 5 | Minimum dry boiling point 260°C, does not absorb moisture | Classic vehicles, special brake systems |
| DOT 5.1 | Minimum dry boiling point 270°C, minimum wet boiling point 180°C | High-performance vehicles, severe driving conditions |
Using the wrong type of brake fluid can lead to several issues, including:
Reduced braking performance
Damage to brake seals and other components
Corrosion of brake lines and calipers
Voiding of vehicle warranty
Always double-check the brake fluid specification before adding or replacing fluid in your vehicle's braking system.
After bleeding your brakes, it's essential to perform a test drive and evaluate the braking system's performance. During the test drive, pay attention to the following:
Brake pedal feel (firmness and responsiveness)
Stopping distance
Brake noise or vibration
Brake fluid leaks
Warning lights on the dashboard
To ensure proper brake function after bleeding, follow these steps:
Start the engine and press the brake pedal firmly. The pedal should feel firm and responsive, with no sponginess or excessive travel.
Drive the vehicle at low speeds in a safe area, testing the brakes by gently applying pressure to the pedal. The brakes should engage smoothly and bring the vehicle to a stop without pulling to one side or requiring excessive force.
Gradually increase speed and test the brakes at higher velocities, ensuring consistent performance and no signs of fade or reduced effectiveness.
After the test drive, recheck the brake fluid level and inspect the brake components for any signs of leaks or damage.
If you notice any issues during the test drive or inspection, it's essential to address them promptly to ensure the safety and reliability of your vehicle's braking system.
One of the most effective ways to prevent the need for frequent brake bleeding is to adhere to a regular brake fluid change schedule. By replacing the brake fluid at the recommended intervals, you can help prevent moisture contamination, maintain the fluid's optimal properties, and protect your brake components from corrosion.
To keep your brake system moisture-free, consider the following tips:
Store brake fluid in a sealed container in a cool, dry place.
Avoid leaving the brake fluid reservoir cap off for extended periods.
Regularly inspect brake lines and components for signs of leaks or damage.
Use a brake fluid with a higher boiling point, such as DOT 4 or DOT 5.1, if recommended by your vehicle manufacturer.
If you suspect a brake fluid leak or notice signs of worn brake components, such as squealing or grinding noises, it's crucial to address these issues promptly. Ignoring leaks or worn parts can lead to more severe damage, reduced braking performance, and the need for more frequent brake bleeding.
In this comprehensive article, we've explored the 10 warning signs that indicate it's time to bleed your brakes, providing you with the knowledge and tools to maintain your vehicle's braking system effectively. By understanding the importance of regular brake maintenance, recognizing the symptoms of air in the brake lines, and following the proper bleeding procedures, you can ensure optimal braking performance and safety for yourself and your passengers.
Remember to always use the correct brake fluid, adhere to the recommended change intervals, and promptly address any leaks or worn components. If you're ever unsure about your ability to bleed your brakes properly or encounter persistent issues, don't hesitate to seek the help of a professional mechanic or brake specialist.
By staying vigilant and proactive in your brake maintenance, you can enjoy the peace of mind that comes with a reliable, high-performance braking system, keeping you and your loved ones safe on the road for years to come.
Bleeding your brakes every 1-2 years or whenever you notice a spongy pedal feel will keep your braking system in top shape. Regular brake fluid changes according to your vehicle's maintenance schedule will also ensure reliable stopping power.
Routinely bleeding your brakes removes air bubbles and contaminants that can degrade braking performance over time. This simple maintenance task keeps your brake system operating efficiently and safely for confident stopping power in all conditions.
Always use the specific brake fluid type recommended by your vehicle manufacturer to ensure compatibility and optimal performance. Using the correct brake fluid will provide the best braking characteristics and protection against corrosion.
Many vehicles allow DIY brake bleeding using basic tools, as long as you follow the proper procedure and safety precautions. Referring to a service manual and having a helper to press the brake pedal will make the process easier and more efficient.
A spongy or soft brake pedal that sinks to the floor is the most common indicator of air bubbles trapped in the brake fluid. Brakes that feel less responsive or require pumping to stop the vehicle also suggest it's time for a brake bleed.
While bleeding replaces old fluid and removes air from the brake system, it will not repair a leak in the lines, calipers, or master cylinder. Leaks must be properly diagnosed and repaired before performing a brake bleed to restore braking performance.
Bleeding all four brakes ensures that fresh, clean fluid circulates through the entire system for optimal performance. Following the correct sequence, starting with the wheel furthest from the master cylinder, will provide the best results.
A basic brake bleeding kit includes a wrench to open the bleeder screws, clear tubing to direct fluid into a catch bottle, and fresh brake fluid. A helper to press the brake pedal or a one-person bleeder kit can make the job easier.
You'll know your brakes are properly bled when the brake pedal feels firm and responsive without sponginess. Pumping the pedal should produce consistent pressure and a steady stream of clean fluid from the bleeder screw without bubbles.
Used brake fluid should be collected in a sealed container and disposed of properly at a recycling center or auto parts store. Brake fluid is corrosive and harmful to the environment, so never pour it down the drain or on the ground.
Miguel started tinkering with car radios as a teenager, fascinated by the intricate dance of wires and circuits. This passion led him to pursue a career as an automotive electrician. For the past 10 years, Miguel has tackled everything from flickering headlights to mysterious electrical gremlins. He thrives on troubleshooting electrical problems and enjoys sharing his knowledge to empower car owners to understand their vehicles better.